
A Good Bread Recipe
by amy – May 6, 2016 in Cooking
One of my early attempts at making bread by hand
There’s nothing like bread made by hand. I made my first loaf about eight months ago. My partner and I liked the result so much that we stopped buying storebought bread. Bread is a staple in the house, and one loaf only lasts two or three days. Making bread about twice a week since then has given me plenty of chances to experiment with variations on the recipe that worked for me.
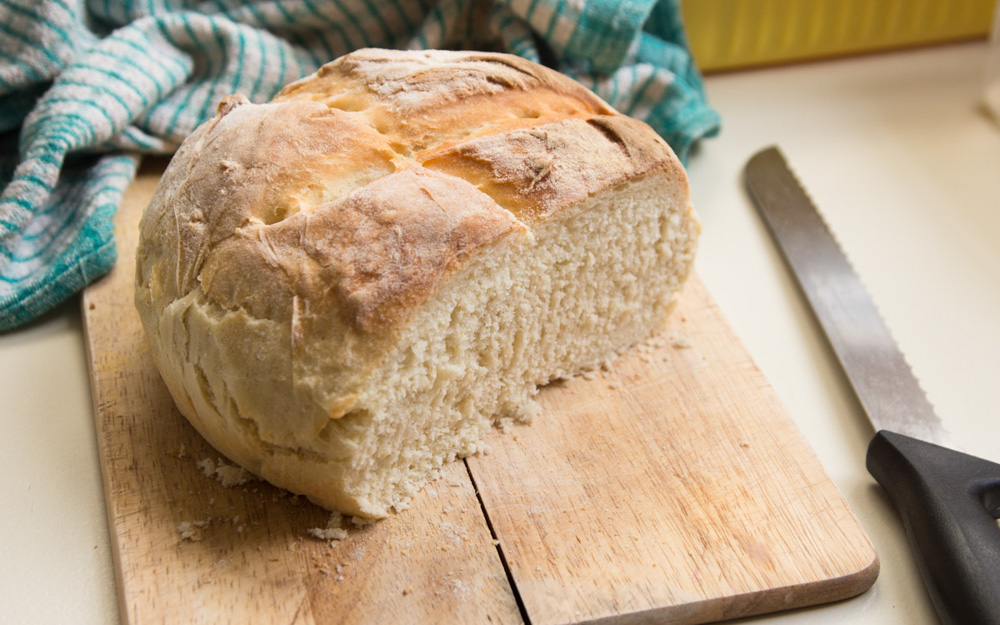
I still remember pulling my first loaf of bread out of the oven. Boy, was it a beautiful sight. I didn’t have a loaf pan at the time, so I had placed the ball of dough on a cookie sheet. Out of the oven came this rustic, golden-brown boule with a hard crust, dusted with flour on top and bearing a pair of slash marks, looking for all the world like the kind of artisan bread you imagine coming out of the oven of a 19th century Italian bakery. “I made that??”, I exclaimed to myself. It was hot and steaming, filling the kitchen with that delicious smell that only comes from freshly baked bread. The smell of your own homemade loaf of bread just out of the oven is so mouthwatering that you won’t hesitate to cut a thick slice, slather it with butter, and taste that first warm, savory, heartwarming mouthful.
Here is the basic recipe I use. You can use white or wholemeal wheat flour, or a mixture of the two. This recipe is a good starting point, and once you have a go at it, you can experiment with fun optional additions like whole grains and seeds. I’ll explain some of my favorite additions later on.
The Recipe:
- 3 1/4 cups flour
- 1 tsp salt
- 2 tsp instant or active dry yeast
- 1 1/2 cups warm water
- 1 tbsp honey or raw sugar
Quick Guide:
1. Proof yeast in a bowl with warm water and honey. Let it set for 5 minutes or until frothy.
2. Mix flour and salt in a separate bowl.
3. Add yeast mixture to flour, form into dough. Knead for 5 minutes and place back in bowl.
4. Let dough rise 1 1/2 hours, covered with a damp tea towel.
5. Knead dough for 5 minutes and place in greased loaf pan, let rise again for 40 minutes.
6. Bake at 425°F for 20-25 minutes, until crust is hard and golden brown.
Step 1: Proof Yeast
Put yeast into a small bowl and measure warm water from the tap to add to it. Technically speaking, the water should be about 110°F, but you can use the baby formula trick: put a drop on the inside of your wrist; if you can’t feel it, it’s the right temperature. Add to the yeast and then blend in the honey or sugar with a brief whisking. Then leave it alone for about 5 minutes, or until the yeast activates and the surface becomes a frothy layer.
Note: You can use instant yeast or active dry yeast. Confused about the difference? You’re not alone. I’ve often wondered, is instant yeast dry but not active? Is active dry yeast not instant? Well, here’s a helpful article over at The Kitchn that explains everything. The difference between these types of dry yeast is simple: active dry yeast has a larger granule and needs to be dissolved in water before using, while instant yeast has a more fine texture and can be mixed right into dry ingredients. And just like that, one of the big perplexing questions in my life has just been answered. Thank you, oh wise and wonderful internet!
Step 2: Measure Flour and Salt
While the yeast is proofing, measure out the flour into a medium sized mixing bowl and add salt. You can use any combination of white or wheat flour to make the 3 1/4 cups. Note that wheat flour will make the dough denser and somewhat dryer, however you shouldn’t need any additional water, you will just require less flour during the kneading stage. I use a whisk to mix the salt into the flour. Keep extra flour at hand for the following steps.
Step 3: Mix and Knead Dough
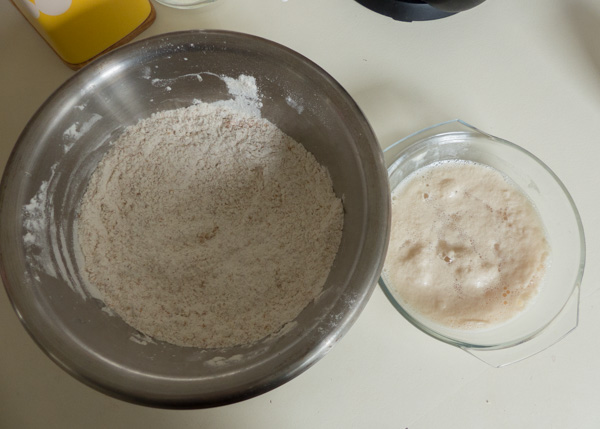
Proofed yeast ready to add to flour
When the yeast is ready, make a well in the flour and pour in the yeast mixture. Now it’s time for the fun part. Mix the contents together with your hands or a wooden spoon until it forms a ball of dough. It will take a little massaging to get all of the flour to join the mass of dough. Then spread some flour onto your counter or working space and place the dough on it. Knead it with your hands for 5 minutes. To do this, use both hands to fold the dough over on itself, pulling the top edge toward you and pushing it downward into the dough. Turn it 90° and repeat this action. Add flour as needed to prevent it from sticking to your hands. The kneading process gets the yeast working, ensures that the moisture is evenly distributed in the dough, and gets the gluten bonds forming which give dough its elasticity.
Note: The kneading can be skipped if you’re in a hurry. As explained in this 5 minute bread dough recipe, transcribed from the famous book Artisan Bread in Five Minutes a Day by Jeff Hertzberg and Zoe Francois, you can make great bread without kneading at all. In other words, there is no need to knead! (*ba-doom, chah*)
Step 4: Let Dough Rise
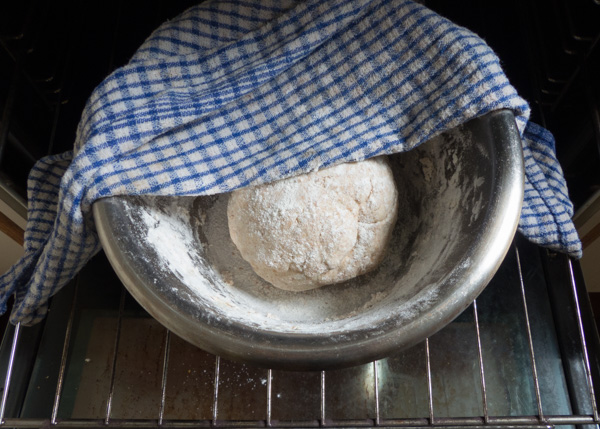
Dust the dough with flour and cover the bowl with a damp towel. The cold oven is a good place to let it rise undisturbed.
Place the kneaded dough back in the bowl, formed into a round ball. Dust it with flour, then cover the bowl with a dampened tea towel. You can also drape a piece of plastic wrap over the bowl, just make sure it’s not airtight. Leave the bowl on the counter or in the unheated oven for 1 1/2 hours to let the dough rise. In the meantime you can read The Dough Also Rises by Ernest Bakersway. Great book.
Step 5: Knead Again and Let Rise
After 1 1/2 hours, the dough should have risen and spread out to the sides of the bowl. If the yeast is working properly, the dough should be sticking to the sides of the bowl and the elasticity will be apparent as you start handling it. Sprinkle some flour on the surface, punch it down and form it into a ball again, then place it once again on a floured working surface. Knead it for another 5 minutes, adding flour if it’s too sticky. Then place it into a loaf pan that is greased or lined with parchment paper, pushing it down to fill the bottom of the pan. Cover the pan with the same tea towel and let rise another 40 minutes.
Note: If you want to make a boule instead, you can place the dough onto a greased skillet or cookie sheet in a round ball. In this case, it’s good to form it into a smooth ball with no creases. You can do this by grabbing folds of the dough at the top of the ball and pulling them down to meet underneath, thereby hiding all folds at the bottom of the boule.
Step 6: Bake Some Bread!
Preheat the oven to 425°F while the bread is in its second rise. The preheating takes about 15-20 minutes. While the oven is warming up, remove the towel from the risen dough. Dust the top with flour, and make slash marks across the top with a knife, about 3/4″ deep or so. I usually make a big “X” down the length of the loaf, but you can make any kind of marks – your name, a pentagram, hieroglyphs, the Da Vincii code – whatever blows your hair back. The slashes, which I thought were just decorative at first, are actually important to save the crust from cracking as the dough expands during baking.
When the oven is ready, place a metal pan on the bottom rack and add a cup of water. This evaporates during baking to keep the moisture level high in the oven. Put the dough pan on the middle rack and bake for 20-25 minutes. Check it at 20 minutes, because ovens vary. Test for doneness by tapping the crust with the broadside of a knife while it’s baking. If the crust is hard and the knife makes a loud “thwap!” noise as it bounces off, then the bread is done. If there is some buoyancy to the crust, I let it bake longer. I find the knife-tap to be a surefire method.
When the bread is done, remove it from the oven right away. Turn it upside-down onto a cutting board and let the moisture evaporate from the bottom. It should be golden brown on all sides.
Step 7: Enjoy the first buttery slice!
Once the bread has cooled enough to handle, go ahead and cut off a slice. There’s nothing more satisfying than biting into that first, fresh slice, still hot from the oven, and it’s especially delicious with a good slathering of butter.
Storage: I keep my fresh loaf on the counter wrapped in two tea towels. This allows it to breathe without letting it dry out, as long as it’s eaten within a week.
Additions: You can add all kinds of whole grains and seeds to your bread. I’ve experimented with whole chia seeds, flax seeds and rolled oats. I’d be curious to hear what you add if you try your own additions. I add these grains at the same time that I combine the yeast and the flour. For chia and flax seeds, it’s important to soak them first, because otherwise they will suck a lot of moisture out of the dough. Soaking can be done overnight or 10 minutes prior to using. Mix 1 tbsp of chia seeds with 4 tbsp (or 1/4 cup) of water, and let sit for 10 minutes. The seeds absorb the water and turn into a gelatinous mixture that reminds me of tapioca, or frog eggs. Flax seeds might work with the same 10 minute method, although I’ve only used them soaked overnight. For a nice rustic, artisan look, you can also sprinkle dry whole grains on top of your loaf just before it goes in the oven.
Enjoy, and be sure to leave a comment and let me know how it went if you tried this recipe. Thanks for reading!
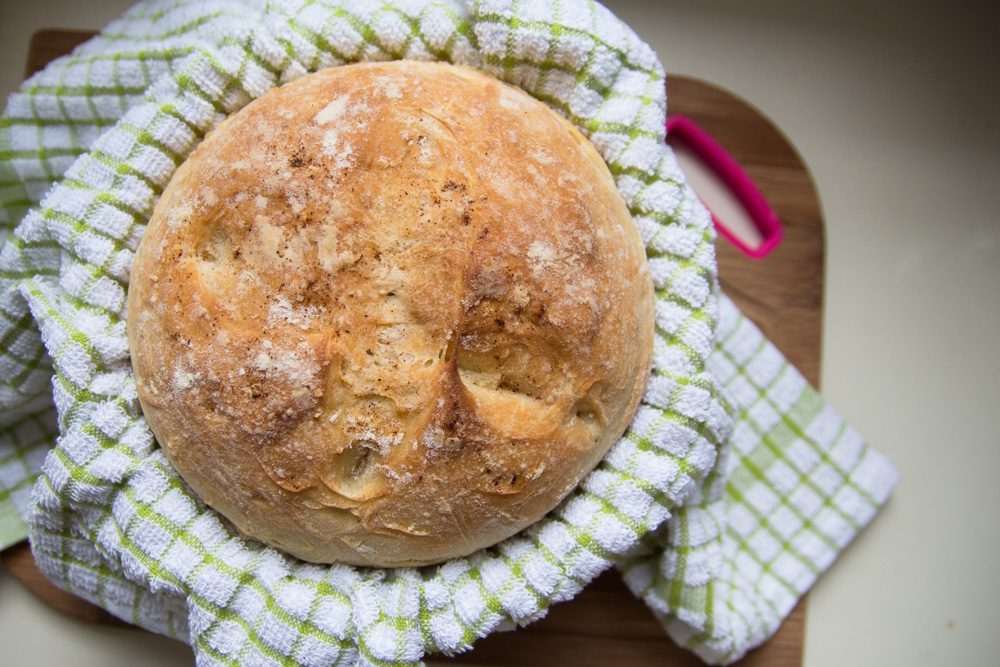
Freshly baked boule of bread. Yum!